After you create a menu, you also need to tell WordPress where to use it. This is where the Manage Locations tab on the Menus page comes in.
After clicking the Manage Locations tab on the Menus page, you will be shown a page similar to below, with a list of the various menu locations used in your Theme. You may have one menu location or you may have multiple, depending on the Theme currently in use. Your menu location wont necessarily be called 『Desktop Horizontal Menu』 either, as shown below. Again, that will depend entirely on your Theme.
Assign an existing menu that you』ve created to the appropriate Theme Location by selecting it from the dropdown list. Click the Save Changes button to save your changes.
Alternatively, you can choose to create a new menu and automatically assign it to the location by clicking the Use new menu link.
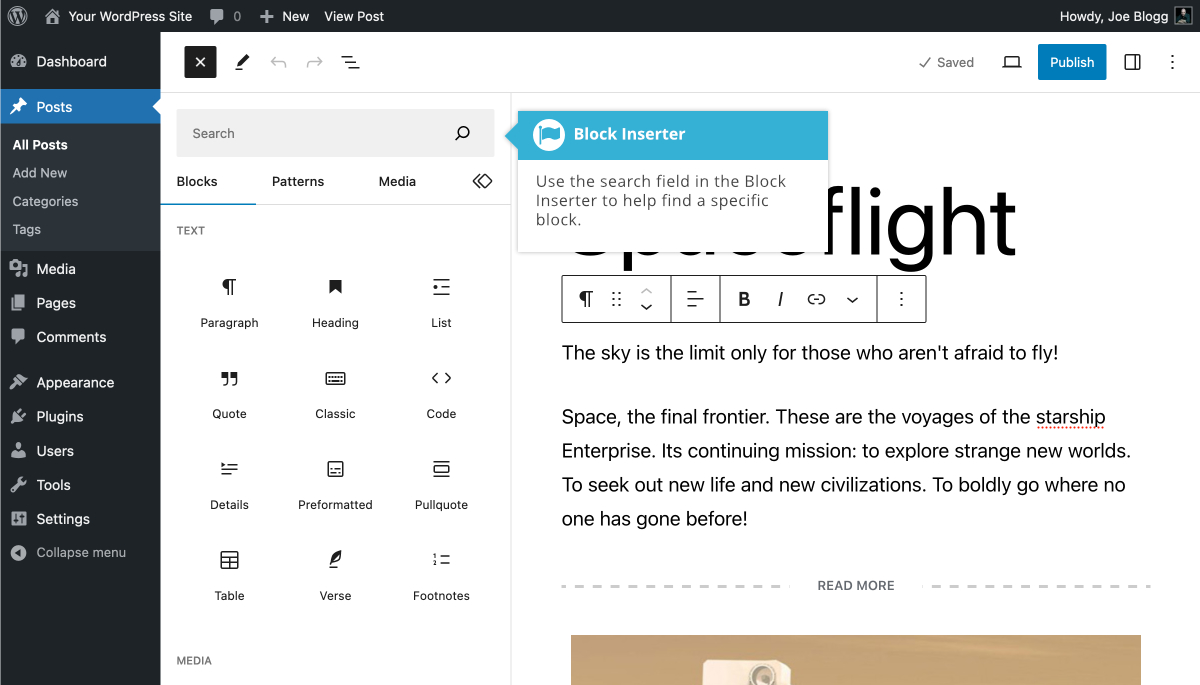
When inserting blocks using the Block Inserter panel, you'll notice that they're sorted into different sections based on their type. At the very top of the Block Inserter is a search field that allows you to filter the list of blocks shown to make it easier to find the block you're looking for. The search field will filter the list based on the blocks name and type. For example, typing 『im' in the search field (without the quotes) will show you a list of blocks that either start with, or are related to images, such as the Image Block, Gallery Block, Media & Text Block etc….
The Block Inserter separates your blocks into different types. These include the following:
Text – This section contains all the basic text type blocks such as the Paragraph Block, Heading Block, List Block, Classic Block, Quote Block etc..
Media – This section contains all your image and media type blocks such as the Image Block, Gallery Block, Audio Block, Cover Block etc..
Design – This section contains more specialised content blocks, primarily used for enhancing the design of your page such as the Buttons Block, Columns Block, Group Block etc..
Widgets – This section contains special widgets such as the Shortcode Block, Archives Block, Categories Block, Latest Comments Block, Latest Posts Block etc..
Theme – This section contains special blocks that allow you to add different template parts to your content. Although some of these blocks can be added to your regular Page or Post content, these blocks are best utilised within the Full Site Editor.
Embeds – This section contains blocks for all the familiar Embeds that you're accustomed to using within WordPress. It contains the Tumblr Block, Twitter Block, YouTube Block, Spotify Block, etc…
Not shown by default, is the Most Used blocks section. The blocks that appear in this section will change based on the blocks that you've added to your content. As the name suggests, this section contains your most used blocks. To enable this section in the Block Inserter, click on the Options icon () at the top of the page and then click on the Preferences menu option. In the popup window that is displayed, turn on the Show most used blocks option within the Blocks tab. The Most Used blocks section will now appear in the Block Inserter, just above the Text section.
透過使用特殊的鍵盤快捷鍵,新增內容現在變得更加容易。當您想要向內容新增不同大小的標題時,您現在可以使用兩個或更多主題標籤 (#) 開始一行,然後按 Enter 鍵轉到下一行,而不必從工具欄下拉選單中選擇標題大小,視覺化編輯器會自動將您的文字轉換為適當的標題。與標題一樣,您也可以使用*或–建立無序列表,使用1。將啟動一個有序列表,>將建立一個塊引用。
貼上為文字- 從其他網站或文書處理程式複製和貼上文字有時會導致文字格式與您期望的不同。原因是,格式化原始文字的 html 標籤或程式碼通常會與文字本身一起貼上。為了避免這種情況,貼上為文字將刪除所有這些格式和 html 標籤。「貼上為文字」 選項就像一個開關,一直保持開啟狀態,直到您再次單擊該按鈕將其關閉或直到您儲存頁面內容
清除格式- 使用此功能可以從突出顯示的文字中刪除所有格式 (例如粗體、下劃線、文字顏色等)
特殊字元- 用於插入不易透過鍵盤訪問的特殊字元 (例如?、?、?、?、€、?等)
減少縮排– 刪除一級縮排
增加縮排- 將文字縮排一級
撤消– 撤消您的上一個操作
重做– 重做您的上一個操作
鍵盤快捷鍵– 顯示有關 WordPress 視覺化編輯器的資訊以及鍵盤快捷鍵
視覺/文字– 在視覺編輯器和文字編輯器之間切換編輯器檢視。文字檢視將使您能夠檢視構成內容的 HTML 程式碼。對於更有經驗的使用者,這有時會有所幫助,但對於那些不熟悉 HTML 標籤的使用者,不建議這樣做