要編輯您的個人資料詳細資訊,只需在檢視使用者列表時單擊您的使用者名稱,或者將滑鼠懸停在每一行上時單擊使用者名稱下方出現的編輯連結。或者,單擊左側導航欄中的個人資料連結。
If you』re an Administrator and would like to edit someone else』s profile, click on their user name when viewing the list of Users or click on the Edit link that appears beneath their user name when hovering your cursor over each row.
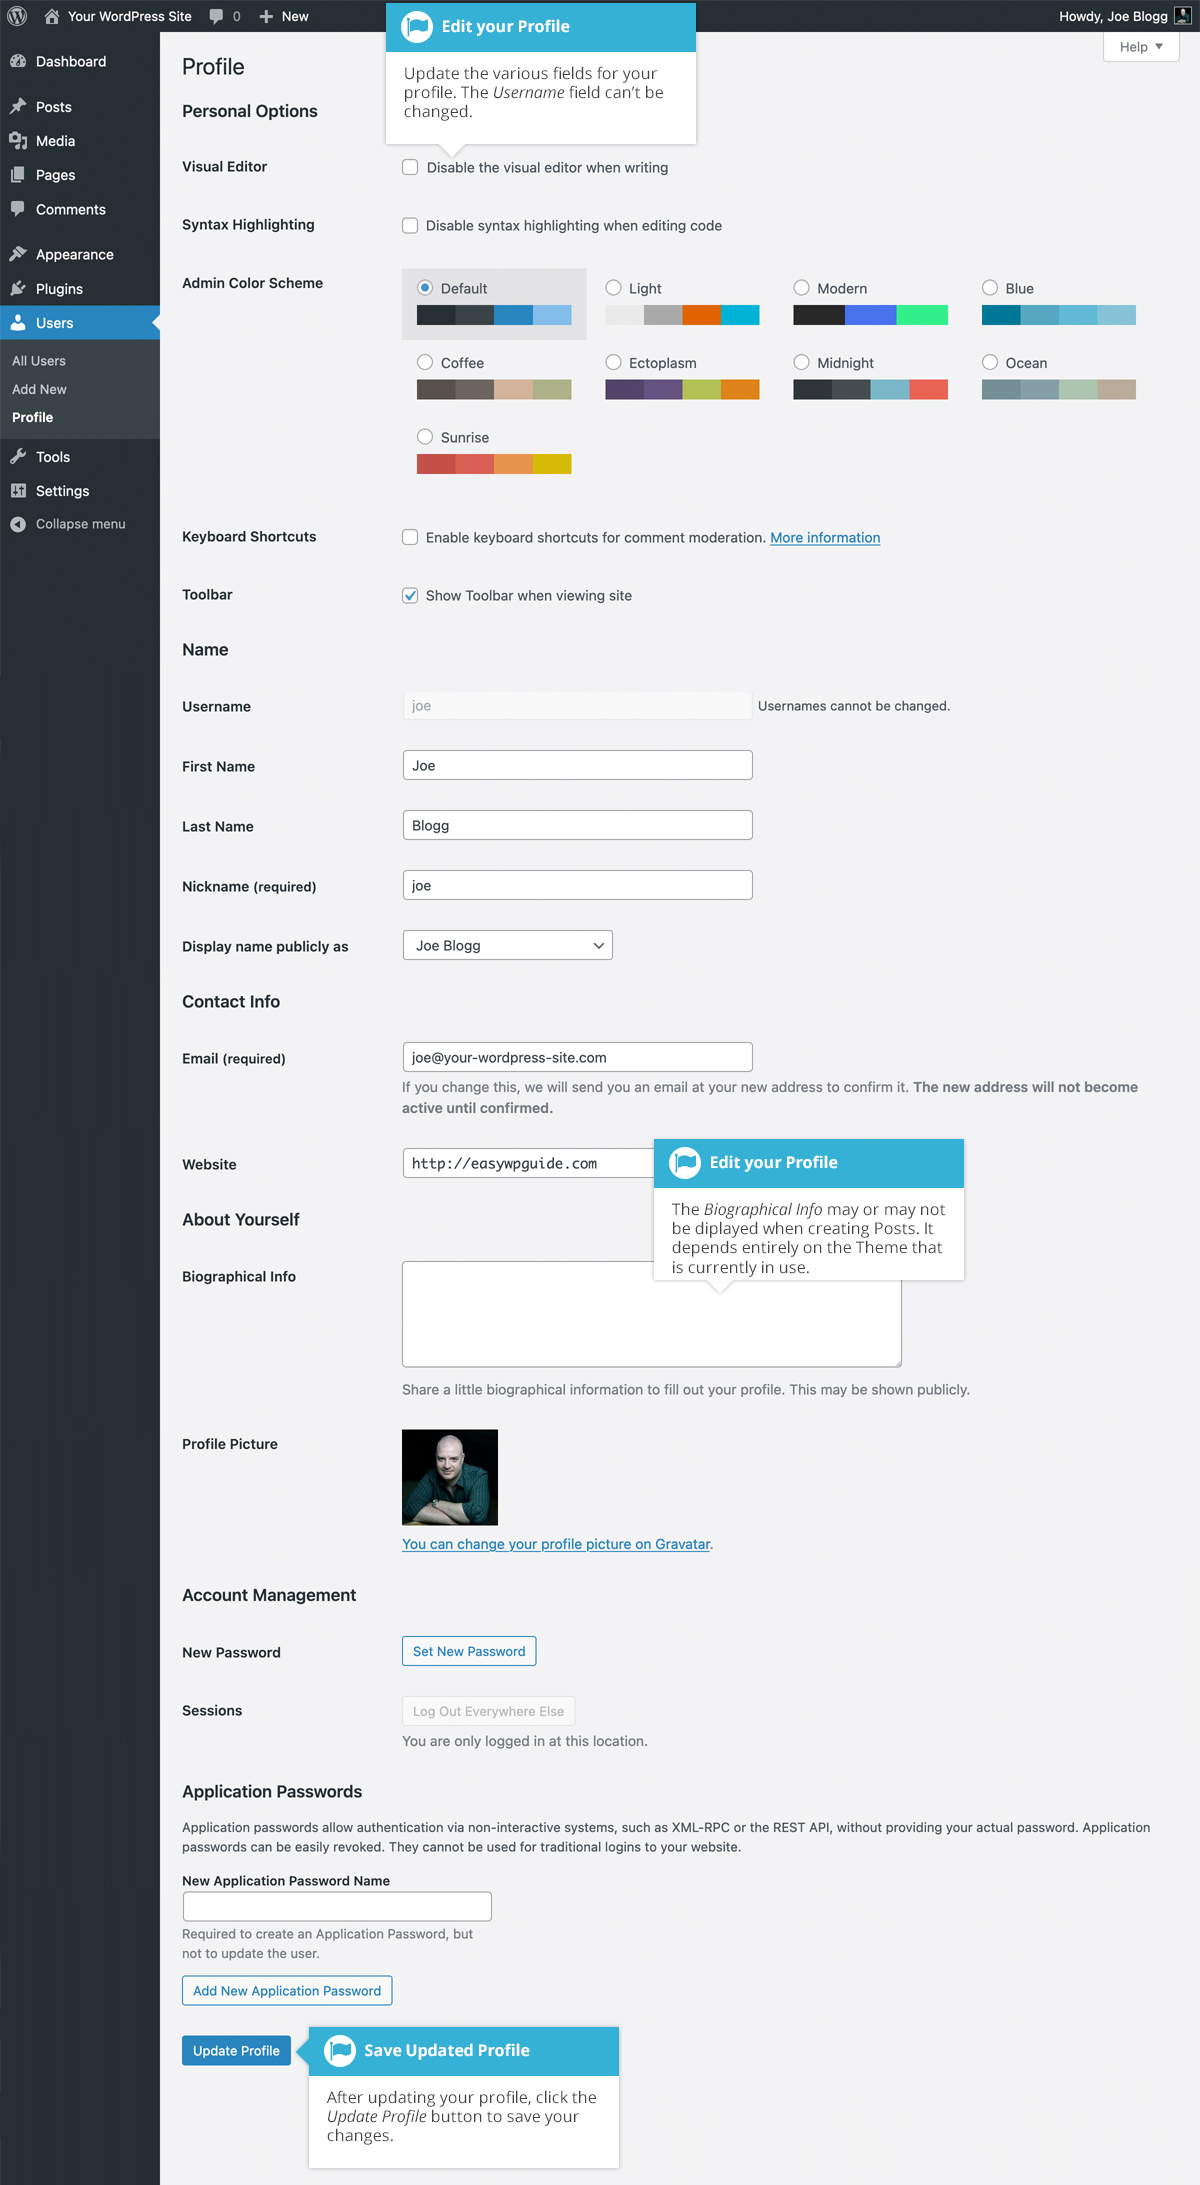
Update the appropriate fields and then click the Update Profile button to save all your changes.
Personal Options
- Visual Editor – Checking this box disables the Visual Editor when writing and uses the plain html editor
- Syntax Highlighting – Checking this box disables the syntax highlighting when editing code in the built-in editor
- Admin Color Scheme – Check this radio button next to the colour scheme desired for the administrative panels. You have the choice of eight different color schemes
- Keyboard Shortcuts – Checking this box Enables keyboard shortcuts for comment moderation. Keyboard shortcuts are designed to allow you to rapidly navigate and perform actions on comments
- Toolar – Checking this box will display the Admin Bar at the very top of your website (only for the person who is currently logged in)
Name
- Username – You cannot edit your Username because it is used as your Username during the login process. Even an Administrator cannot change your Username. Usually, no one else ever needs to see your Username
- First name – Enter your first name in this text box
- Last name – Enter your last name in this text box
- Nickname – (mandatory) The nickname is a requirement for every user. It may be the same as your Username or it can be different. If you don』t supply a Nickname, then the Username will be placed in this field
- Display name publicly as – Select how your name is cited on your blog, from the dropdown list. You can choose from several choices: Nickname, Username, First Name, Last Name, 『First Last』, or 『Last First』. If you prefer 『Last First』, insert a comma after your last name in the Last Name text field and choose the last option from the dropdown list. For security reasons, it』s a good idea to keep this different from your Username
Contact Info
- E-mail – (mandatory) All users are required to list an email address in their respective Profiles. The email address must be unique for each user. Your blog will use this address to notify you of new comments to your posts and for other administrative purposes. Only other registered users of your blog will have access to this email address. It is never sent anywhere
- Website – Enter your website address
About Yourself
- Biographical Info – Enter a short description or profile of yourself here. Depending on your theme, this optional information may be displayed when creating new Posts
- 個人資料圖片– 顯示的頭像稱為 Gravatar 。Gravatar 是全球公認的頭像。要建立 Gravatar,只需訪問 gravatar.com 並註冊即可。要在 WordPress 中使用您的 Gravatar,只需將郵箱地址新增到您在 Gravatar 站點中配置的個人資料中,它將自動顯示
帳戶管理
- 新密碼– 單擊「生成密碼」按鈕生成新的強密碼。密碼強度指示器將顯示在密碼欄位下方
- 會話– 如果您在公共計算機上保持帳戶登入狀態或者丟失了手機,則可以單擊 「在其他地方登出」按鈕,從除當前瀏覽器之外的所有位置登出
應用程式密碼
- 新應用程式密碼名稱– 應用程式密碼允許應用程式向各種 WordPress API(例如 REST API) 發出經過身份驗證的請求。僅當您的站點使用 SSL 證書 (即您的站點 URL 以 https:// 開頭,而不是 http://) 時,此部分才可見。此欄位允許您指定生成的密碼的名稱。大多數使用者永遠不需要使用此部分